Easy Crochet Christmas Bell Ornament: Free Step-by-Step
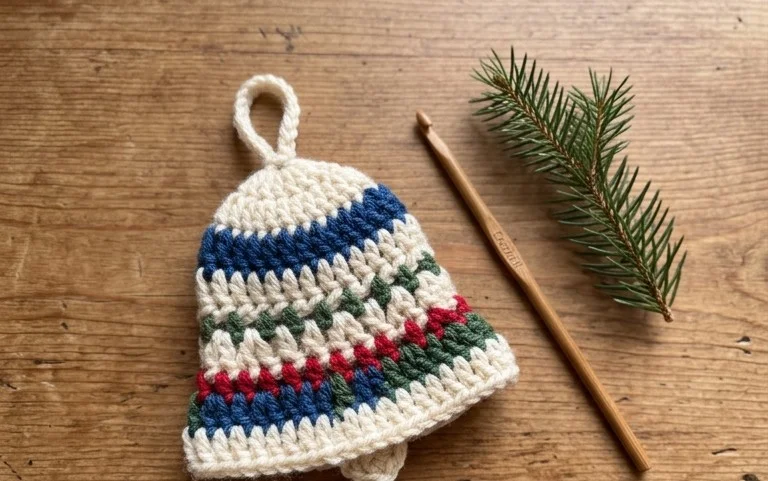
A small cotton bell resting on a pine branch brings a quiet charm to your holiday decor. This project creates a dense, structured ornament that holds its shape through many seasons of display. If you are new to crochet, you will appreciate how the single stitch pattern allows your hands to find a steady, calming rhythm without complex shaping. Experienced makers will enjoy this as a quick win that clears out leftover yarn scraps. You will master the magic ring technique and learn how to maintain a consistent tension to prevent stuffing from showing through the fabric.
Why This Project Is Worth Making
This beginner-friendly project is a quick, rewarding make that requires less than one skein of yarn. Its simple construction relies on continuous rounds of single crochet, making it a meditative task for your hands while listening to an audiobook or watching television. Because it works up so rapidly, you can produce a batch of them in a single weekend. It also serves as an excellent way to use up partial skeins of medium-weight yarn left over from larger garment projects.
I managed to finish this in one sitting. The instructions were very easy to follow and it looks perfect on my desk.
— Sarah, crochet hobbyist
Pattern Overview & Skill Level
- Skill Level: Beginner
- Approximate Time: 1 to 2 hours
- Construction: Worked in continuous rounds using a magic ring for the base, followed by even rounds, then finished with a simple tie-off.
- Finished Dimensions: 4 inches tall by 3 inches wide.
Materials & Supplies Needed
- Yarn: Worsted weight (#4), 100% cotton, approximately 40 yards. Cotton provides the structure needed to keep the item upright.
- Hook Size: 4.0 mm (US G-6). This size produces a tight gauge, which is essential to keep the stuffing from poking through the stitches.
- Notions: Tapestry needle, stitch markers, and fiberfill stuffing.
- Yarn Substitutions: Acrylic yarn is a suitable substitute if cotton is unavailable. Note that acrylic is stretchier than cotton, which may cause the finished item to feel slightly softer and less rigid.
Stitch Guide & Abbreviations (US Terms)
- MR: Magic ring
- ch: Chain
- sc: Single crochet
- inc: Increase (2 sc in the same stitch)
- dec: Decrease (sc2tog, working in the front loops only for an invisible decrease)
- sl st: Slip stitch
- st(s): Stitch(es)
Step-by-Step Pattern Instructions
Main Body
- Rnd 1: Start with a MR, work 6 sc into the ring. Pull tight to close (6 sts).
- Rnd 2: Work 2 sc in each st around (12 sts).
- Rnd 3: 1 sc, inc repeat 6 times (18 sts).
- Rnd 4: 2 sc, inc repeat 6 times (24 sts).
- Rnd 5: Work 1 sc in each st around in the BLO (24 sts).
- Rnd 6-12: Work 1 sc in each st around (24 sts).
Finishing and Closing
- Stuff the body firmly with fiberfill until it reaches your desired firmness.
- Rnd 13: 2 sc, dec repeat 6 times (18 sts).
- Rnd 14: 1 sc, dec repeat 6 times (12 sts).
- Rnd 15: Work dec 6 times (6 sts).
- Fasten off, leaving a 6-inch tail. Use your tapestry needle to weave the tail through the front loops of the remaining 6 stitches and pull tightly to close the opening. Weave the end into the center of the piece to hide it.
Care & Washing Instructions
- Hand wash in cool water using a mild detergent to preserve the shape of the fibers.
- Gently press the item between two towels to remove excess water, then lay flat on a drying rack away from direct sunlight.
- Reshape the item with your hands while it is damp to ensure it stays symmetrical as it dries.
Pro Tips & Common Mistakes to Avoid
Maintain consistent tension throughout the project to ensure the fabric does not have visible gaps where the stuffing might show. Use a stitch marker at the beginning of every round to keep track of your count, as working in continuous spirals makes it easy to lose your place. When weaving in your ends, run the needle through the inner fibers of the stitches rather than across the surface to keep the finish clean and invisible. If you choose to adjust the size, remember that adding more rounds to the height will require more yardage, so ensure you have enough yarn before starting the increase section.
Frequently Asked Questions
Can I use a larger hook for this pattern?
Using a larger hook will make the stitches looser, which may result in stuffing showing through the gaps. It will also increase the final size of the item.
How do I make the item larger?
You can increase the size by adding more rounds to the base before starting the even rounds. For every additional increase round, add 6 stitches to your total count and maintain that count for the height section.
Is this project suitable for absolute beginners?
Yes, this project is designed for those who know the basic single crochet stitch and are ready to practice working in rounds and basic increases.
Am I allowed to sell items made from this pattern?
You are welcome to sell finished items you create using this pattern. Please credit the design when listing your items online or at craft markets.
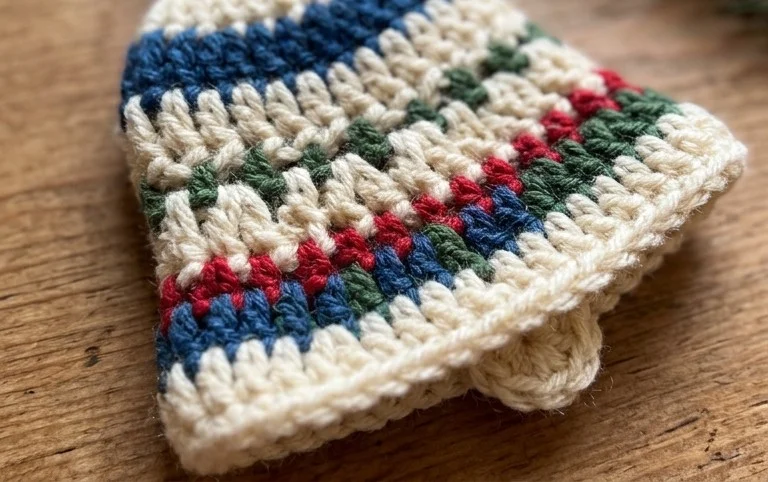
Your finished ornament hangs beautifully on a tree or adds a festive touch to a wrapped gift. Try making a few in metallic gold or deep forest green to change the overall look, or use a smaller hook to craft a miniature version for your holiday table. Sharing your finished creation helps others find inspiration for their own seasonal projects. Please consider posting a photo of your work on your favorite social media platform. Check out more of my seasonal handmade patterns available on the main blog page.