Easy Bowl Cozy Hot Pad: Free Crochet Pattern for Beginners
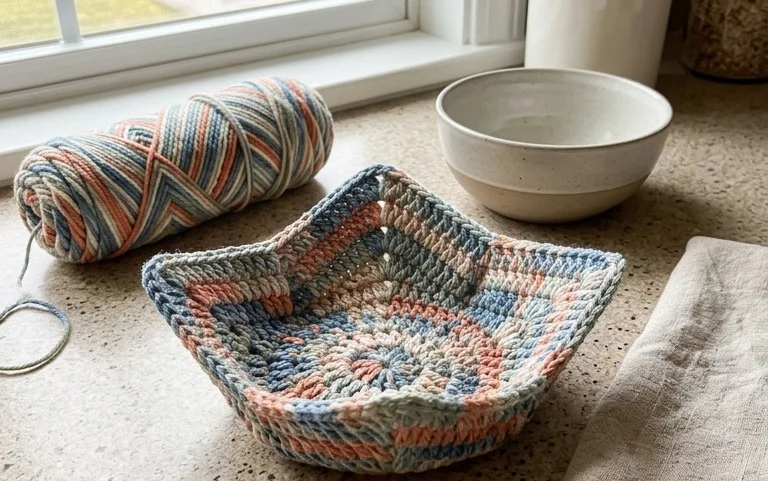
A bowl cozy feels like a hug for your warm soup, protecting your hands from heat while keeping your meal at the right temperature for longer. These functional projects offer a satisfying way to organize your kitchen using simple cotton scraps that might otherwise sit in a forgotten drawer. Beginners often find this pattern approachable because it relies on basic increases and steady tension to create a thick, durable fabric that survives daily use. You will master the process of working in rounds to build a sturdy base, gaining confidence with every stitch as your cozy takes shape beneath your hands.
Why You’ll Love This Pattern
This beginner-friendly crochet coaster set is the ideal project for using up small amounts of leftover cotton yarn. Because each coaster works up in under 30 minutes, you can easily complete a full set of four in a single afternoon. The dense, textured stitch pattern provides a stable surface for mugs while protecting your furniture from condensation and heat. This project requires no complex assembly or sewing, making it a stress-free choice for those new to crochet or anyone looking for a meditative, repetitive stitch pattern to work on while listening to a podcast.
I managed to finish a set of six coasters in one weekend using yarn scraps from my stash. The pattern is very easy to follow and the result is thick enough to be functional.
— Sarah, hobbyist crocheter
Pattern Overview & Skill Level
- Skill Level: Beginner
- Approximate Time: 20-30 minutes per coaster
- Construction: Worked in joined rounds, starting from a center point and expanding outward.
- Finished Dimensions: Approximately 4 inches (10 cm) in diameter.
Materials & Supplies Needed
- Yarn: Worsted weight (#4) 100% cotton yarn. You will need approximately 15 yards per coaster. Cotton is the preferred fiber because it is heat-resistant and absorbent.
- Hook Size: 5.0 mm (H-8).
- Notions: Tapestry needle for weaving in ends, scissors, and optional stitch markers to keep track of the start of your rounds.
- Yarn Substitutions: You may use acrylic yarn if necessary, though it will not absorb moisture as well as cotton and should not be used for very hot mugs as synthetic fibers can melt. Using a lighter weight yarn (DK) will result in a smaller coaster, while bulky yarn will require a larger hook and fewer rounds to achieve the same size.
Stitch Guide & Abbreviations (US Terms)
- ch = chain
- st/sts = stitch/stitches
- sl st = slip stitch
- sc = single crochet
- dc = double crochet
- inc = 2 double crochet in the same stitch
- MR = magic ring
Step-by-Step Pattern Instructions
Coaster Body
- Rnd 1: Start with a MR. Ch 3 (counts as first dc), work 11 dc into the ring. Join with a sl st to the top of the beginning ch-3. (12 sts)
- Rnd 2: Ch 3, dc in same st, 2 dc in each remaining st around. Join with a sl st to the top of the beginning ch-3. (24 sts)
- Rnd 3: Ch 3, *dc in next st, 2 dc in next st; repeat from * around. Join with a sl st to the top of the beginning ch-3. (36 sts)
- Rnd 4: Ch 1, sc in each st around. Join with a sl st to the first sc. (36 sts)
Finishing
Fasten off your yarn, leaving a 6-inch tail. Use a tapestry needle to weave the end back through the stitches on the back side of the coaster. Trim the excess yarn close to the fabric to ensure a neat, flat base for your drinkware. If the coaster looks slightly wavy, lightly dampen it and lay it flat on a towel, pinning it into a perfect circle until it dries completely.
Care & Washing Instructions
- Machine wash your cotton coasters on a gentle cycle in cool water to prevent shrinking.
- Lay them flat to air dry on a clean towel to maintain their circular shape.
- If the coasters lose their shape over time, iron them lightly or steam block them to restore their original flat appearance.
Pro Tips & Common Mistakes to Avoid
To achieve a professional look, ensure your tension remains consistent throughout the rounds; tight stitches result in a stiffer coaster, while loose stitches can lead to gaps where liquid might seep through. Always place a stitch marker in the first stitch of each round to avoid losing count, especially when working the final round of single crochets. When weaving in your ends, run the yarn through the back loops of the stitches at least three times in different directions to ensure the tail does not work its way out during washing. If you choose to customize the size, remember that adding more rounds will increase the diameter, which requires significantly more yarn for each additional round added.
Frequently Asked Questions
Can I use wool yarn for these coasters?
While wool is a natural fiber, it is not recommended for coasters because it will felt over time when exposed to moisture and heat. Stick to cotton or linen for the best results.
Is this pattern suitable for someone who has never crocheted before?
Yes, this is an excellent starter project. It introduces the magic ring, basic increases, and the transition between different stitch heights, all of which are foundational skills.
Can I sell the finished coasters?
You are welcome to sell finished items made from this pattern, provided you credit the design. Please do not redistribute the pattern text itself.
How do I make the coasters larger for larger mugs?
To increase the size, simply continue the pattern of Rnd 3. In the next round, repeat the sequence of [dc in next 2 sts, 2 dc in next st] all the way around before finishing with the final round of single crochet.
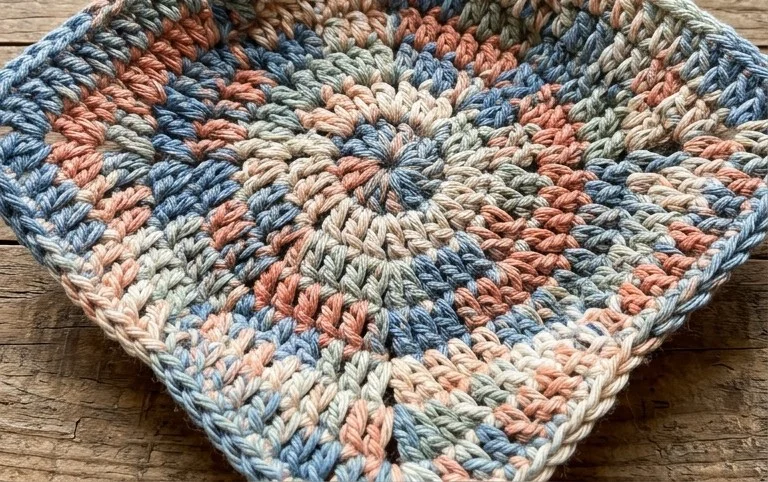
Your finished bowl cozy keeps your favorite cereal or soup bowls stable on the table and protects your wood surfaces from heat marks. Try using a vibrant variegated yarn for your next set to create a playful look that stands out during breakfast. Share a photo of your completed project with the community online so others can see your color choices in action. Take a moment to browse the rest of the blog for more free patterns to build your collection of handmade home essentials.