Easy Crochet Gourd and Small Pumpkin Free Pattern
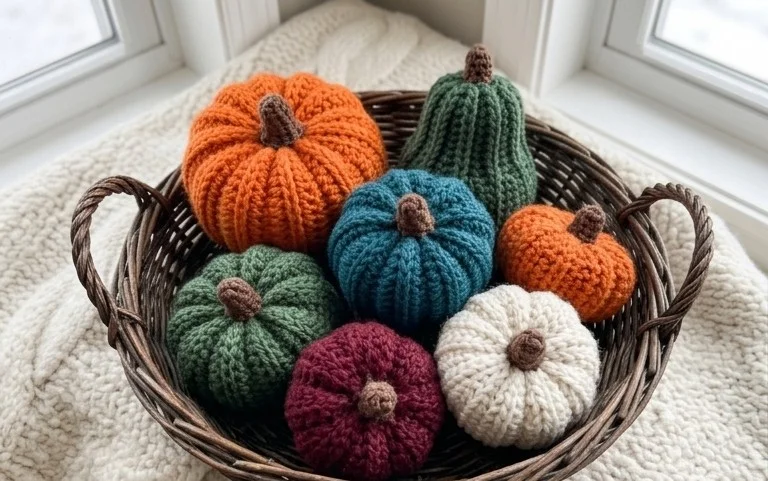
Soft yarn shapes transformed into plump autumn squashes bring a cozy, seasonal touch to your home decor without requiring complex skills. These small decorative pieces sit flat on a shelf and feel firm yet squishy in the hand, making them a satisfying project for beginners who want to practice consistent tension. You will build these gourds using simple single crochet stitches worked in a continuous spiral, which prevents awkward gaps and visible seams from forming. Because the project moves quickly, you can create a whole harvest of pumpkins in various colors to display together for a charming, handmade centerpiece during the chilly months.
Why You’ll Love This Pattern
This crochet sphere pattern uses a simple, repetitive structure that makes it the foundation for countless amigurumi projects. You will find that the constant increase-then-decrease rhythm creates a perfectly smooth, round shape without visible ridges. Because it relies on basic single crochet stitches worked in a continuous spiral, it is an excellent way to practice maintaining even tension. The project works up in under an hour, making it ideal for using up leftover yarn scraps from larger projects. Its compact size also makes it a versatile component for stuffed toys, seasonal ornaments, or decorative sensory balls.
I finally mastered the magic ring thanks to this clear guide. The sphere turned out perfectly round and held its shape well after stuffing.
— Sarah, beginner crocheter
Pattern Overview & Skill Level
- Skill Level: Beginner
- Approximate Time: 45 minutes
- Construction: Worked in continuous rounds starting from a magic ring, increasing to a diameter, maintaining, then decreasing to close.
- Finished Dimensions: Approximately 3 inches in diameter when using worsted weight yarn.
Materials & Supplies Needed
- Yarn: Worsted weight (#4) acrylic or cotton yarn, approximately 25 yards.
- Hook Size: 4.0 mm (G-6).
- Notions: Tapestry needle for weaving ends, stitch marker to track the start of rounds, and polyester fiberfill stuffing.
- Yarn Substitutions: You can use DK weight yarn with a 3.5 mm hook for a smaller, denser sphere, or bulky weight yarn with a 5.5 mm hook for a larger, softer sphere. Note that changing yarn weight will alter the final dimensions and require more or less stuffing.
Stitch Guide & Abbreviations (US Terms)
- MR: Magic ring
- ch: Chain
- sc: Single crochet
- inc: Increase (work 2 sc in the same stitch)
- dec: Decrease (sc2tog: insert hook into front loops of next 2 stitches, yarn over, pull through 2 loops, yarn over, pull through remaining 2 loops)
- st(s): Stitch(es)
- sl st: Slip stitch
- BLO: Back loop only
Step-by-Step Pattern Instructions
Work in a continuous spiral without joining rounds. Place a stitch marker at the first stitch of every round to keep track of your position.
The Sphere Body
- Rnd 1: 6 sc in MR (6 sts)
- Rnd 2: inc in each st around (12 sts)
- Rnd 3: [1 sc, inc] 6 times (18 sts)
- Rnd 4: [2 sc, inc] 6 times (24 sts)
- Rnd 5: [3 sc, inc] 6 times (30 sts)
- Rnds 6–10: sc in each st around (30 sts)
- Rnd 11: [3 sc, dec] 6 times (24 sts)
- Rnd 12: [2 sc, dec] 6 times (18 sts)
At this point, begin adding fiberfill stuffing. Ensure the sphere is firm but not so full that the stitches stretch and show the stuffing inside.
- Rnd 13: [1 sc, dec] 6 times (12 sts)
- Rnd 14: dec 6 times (6 sts)
Finishing
Cut the yarn, leaving a 6-inch tail. Remove the stitch marker. Thread the tail onto a tapestry needle. Weave the needle through the front loops of the remaining 6 stitches and pull tight to close the hole securely. Knot the yarn and pull the needle through the center of the sphere to hide the end inside the stuffing. Trim the excess yarn close to the surface.
Care & Washing Instructions
- Machine wash your finished item on a gentle cycle in cold water using a mild detergent.
- Place the sphere inside a mesh laundry bag to prevent it from snagging on other items in the machine.
- Reshape the sphere gently while it is damp and allow it to air dry completely on a flat surface to maintain its round form.
Pro Tips & Common Mistakes to Avoid
To achieve a professional finish, keep your tension consistent throughout the entire piece. If your stitches are too loose, the stuffing will poke through the gaps. Always use a stitch marker at the start of every round; it is very easy to lose count of where one round ends and the next begins in a spiral. When decreasing, use the invisible decrease method (working into front loops only) to minimize gaps in the fabric. Finally, you can easily adjust the size of the sphere by adding or removing increase rounds, but remember that every increase round adds 6 stitches, so you must add the same number of decrease rounds to close it properly.
Frequently Asked Questions
Can I use a different yarn weight for this pattern?
Yes, you can use any weight of yarn. Use a hook size that is smaller than what is recommended on the yarn label to create a dense fabric that keeps the stuffing contained.
Why are there gaps between my stitches?
Gaps usually occur when the hook is too large for the yarn weight or when tension is too loose. Try dropping down one or two hook sizes until the fabric looks tight enough to hold the fiberfill.
Is this pattern suitable for complete beginners?
This is a perfect beginner project. It teaches the essential skills of working in the round, increasing, and decreasing, which are the foundations for all amigurumi.
Can I sell items made from this pattern?
You are welcome to sell finished items made from this pattern at small scales, such as local craft fairs. Please credit the design to this tutorial.
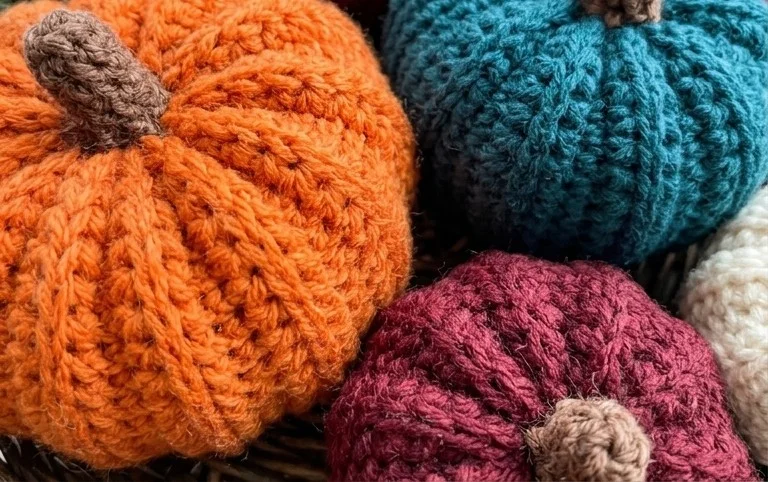
Seeing your handmade gourd display come together on a mantle or shelf brings a genuine sense of accomplishment to your craft room. You might consider using a chunky velvet yarn if you want a softer, more modern texture or working them in neutral shades for a minimalist aesthetic. Sharing a photo of your finished work online helps others find inspiration for their own yarn stash projects. Please take a moment to look through the rest of the blog for more free crochet patterns that help you build your confidence with basic stitches.